The DataMotion for G Suite™ service allows sensitive data to be securely exchanged with customers, business partners and vendors. It’s easy to use since integrates with applications, mobile devices and systems already in use, without the need to install special apps or exchange encryption keys. After following the steps in this guide, G Suite for Business, Education, or Government customer can send and receive sensitive data right from their Gmail™ webmail service, with confidence that the messages are delivered securely and in compliance with privacy regulations.
The remainder of this article discusses how to setup your G Suite service to work with DataMotion and assumes that you possess both a G Suite account and the access rights necessary to perform administrative tasks.
Accessing the Gmail Settings
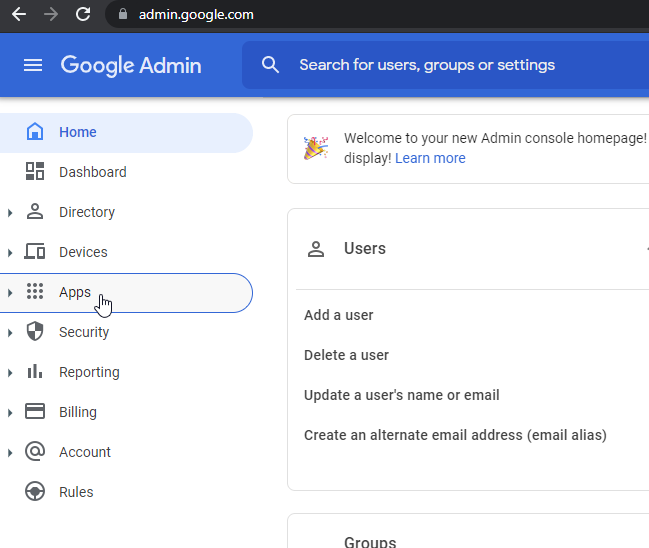
- Log in to the G Suite at: https://admin.google.com.
- Click on Apps dropdown.
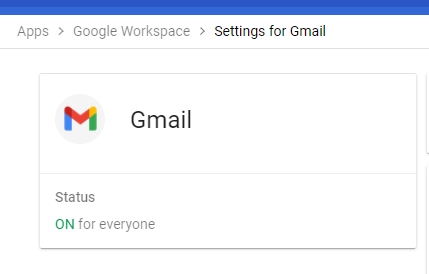
- Click on Gmail.

- Make sure Gmail is turned On for everyone.
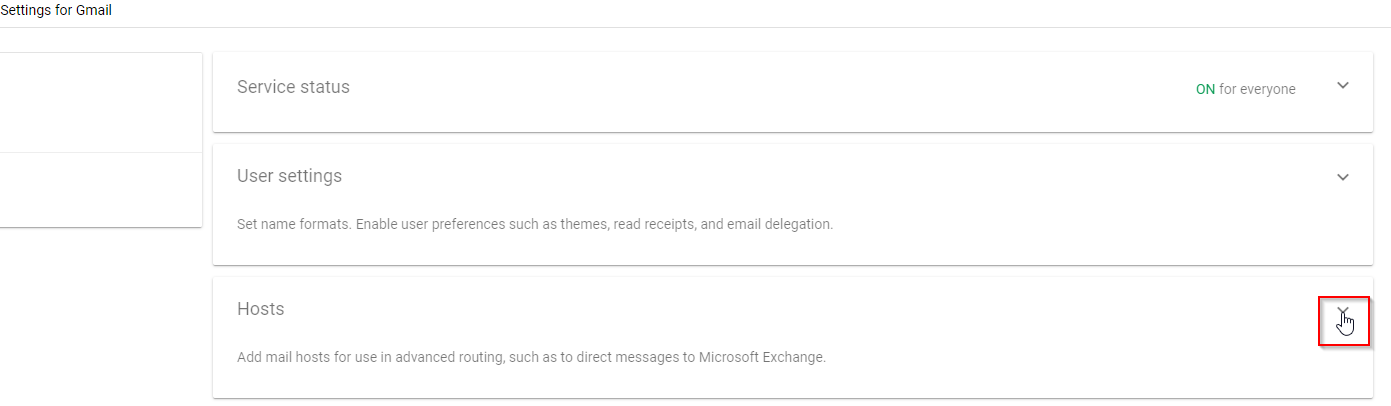
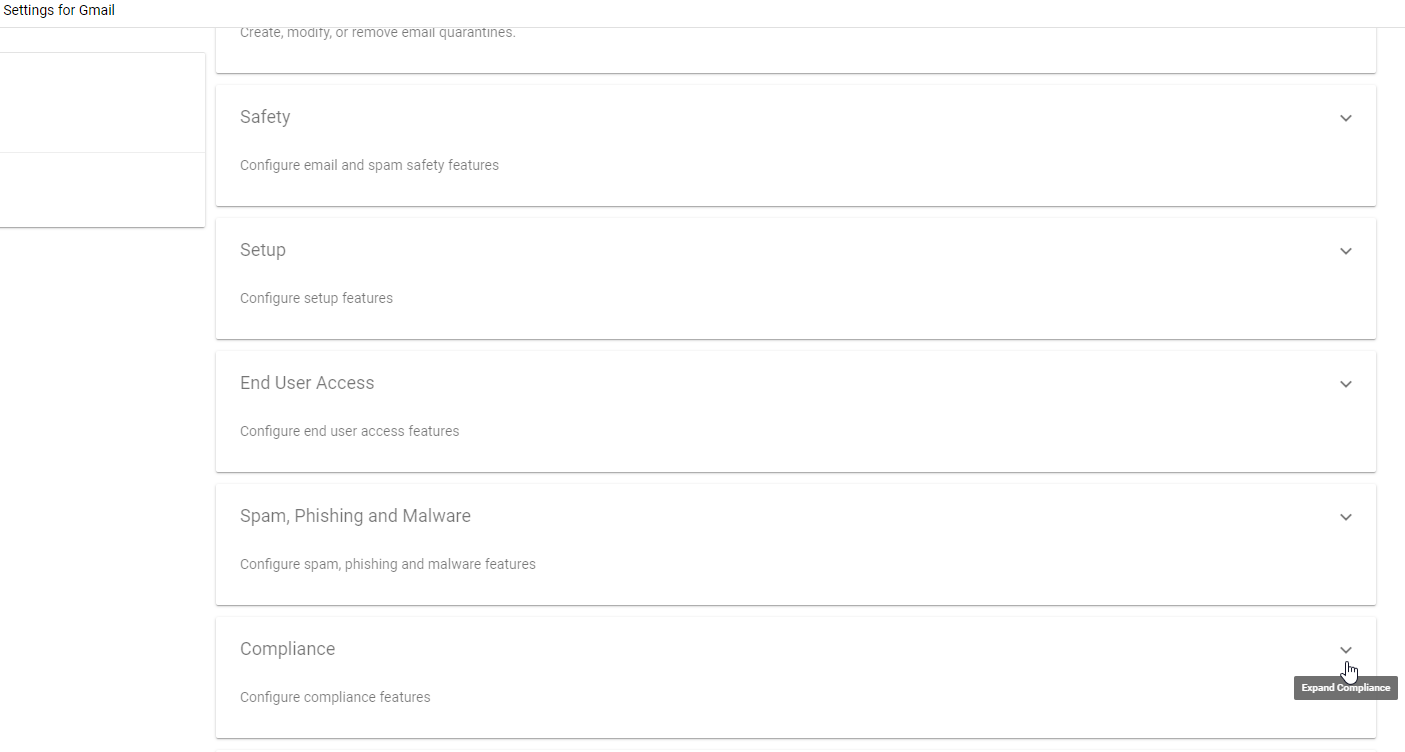
- As shown above, you should be on the Settings for Gmail page which is where the next set of steps need to take place.

Adding a Mail Host
- On the Settings for Gmail page, click on the Hosts dropdown.
- Select Add route to create a mail route to the DataMotion Gateway.
- Use the following settings for the mail route.
- Name: DataMotion
- Select Single Host email server
- Host Name: gateway.datamotion.com
- Port: 587
- Select Require secure transport (TLS) connection (Recommended)
- Select Require CA signed certificate (Recommended)
- Select Validate certificate hostname (Recommended)
- Click Test TLS connection
- Select Save to create the route.

Content Compliance Settings
- Back on the Settings for Gmail page, scroll down and click on the Compliance drop down.
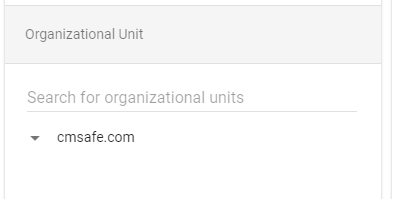
- In the Organizational Unit section, highlight your domain or the OU for which you want to configure settings.
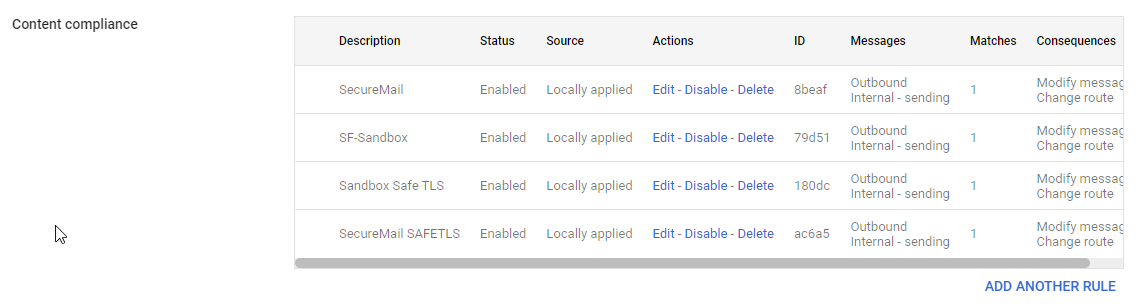
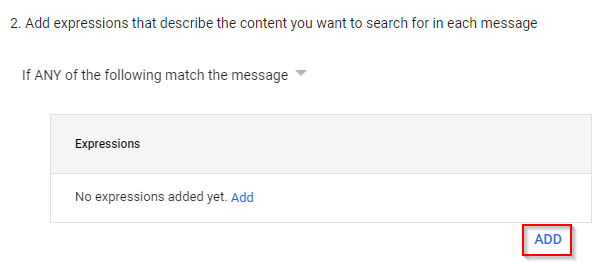
- Scroll to the Content compliance section and select Configure or ADD ANOTHER RULE if you already have rules in place.
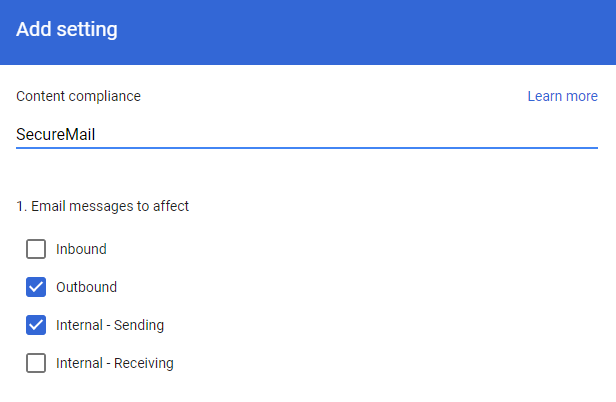
- In the Add setting pop-up window, select Outbound and Internal – sending to ensure that all outbound messages are affected by this rule. Add “SecureMail” (or other appropriate description) to proceed.
- Select Add in the Expressions
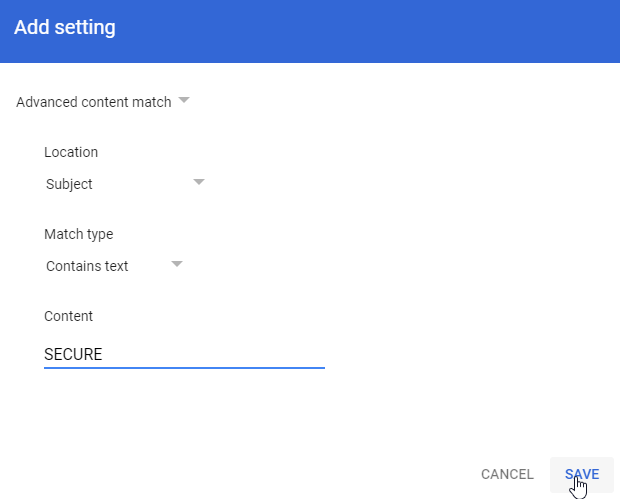
- Select Advanced content match
- Set the Location to Subject
- Set the Match type to Starts with
- Set Content to a tag similar to “SECURE”, for this tag will be used to identify messages that will be routed to the DataMotion mail host for secure delivery to your recipient.
Note: The tag set here must be matched exactly for each secure message.
- Select Save.
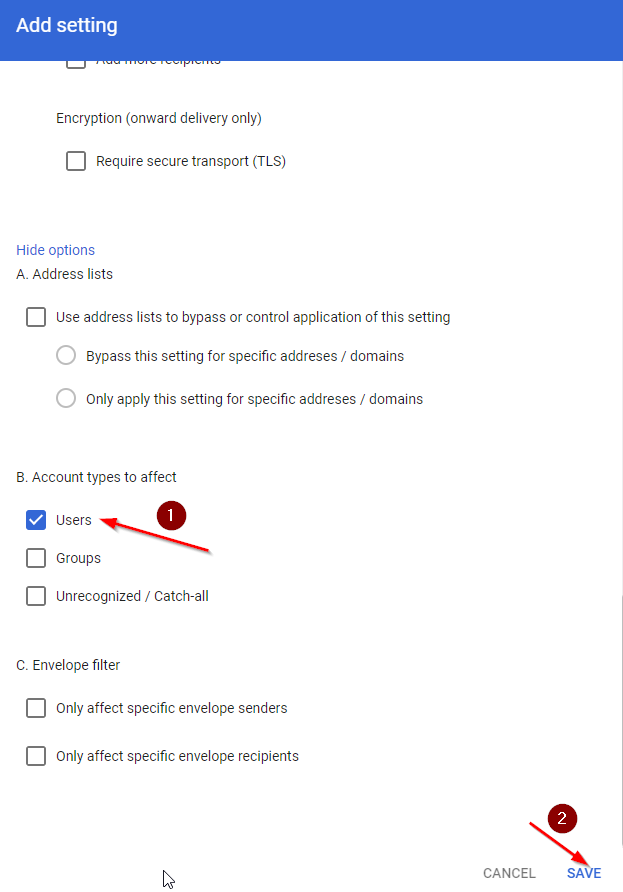
- You must set an action for the 3. If the above expressions match, do the following section select Change route and select the DataMotion mail host you created in the section on Adding a Mail Host.

- In the Show options section select the account types to effect and any other options desired.
- Select Save on the Advanced settings screen at the bottom of the page when it appears.