The DataMotion Secure File Transfer service provides users with a way to send and receive files securely. It is possible to utilize the web portal or a file transfer client as an interface for this service, but this article will be focusing on the use of the popular file transfer client FileZilla. Please read through the instructions below to learn how to connect to your SecureMail account via FileZilla and perform file transfers using the Secure File Transfer service.
Accessing Your Account
The instructions below cover the necessary information to connect to your SecureMail account in FileZilla. These instructions assume the FileZilla client is already open.
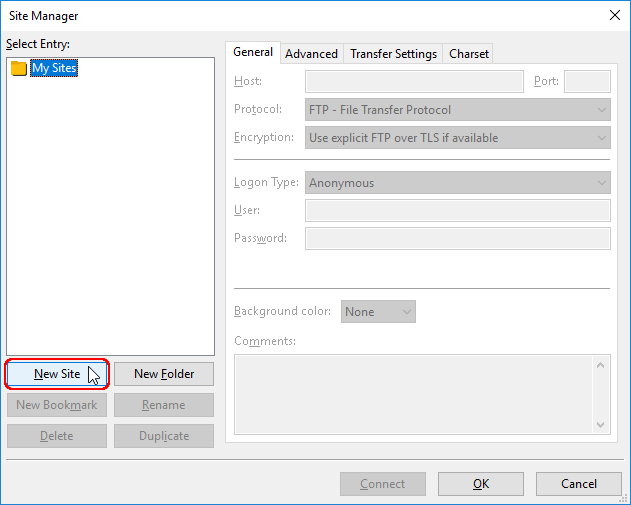
- Open the Site Manager.
- Click the New Site button.
- Perform the following:
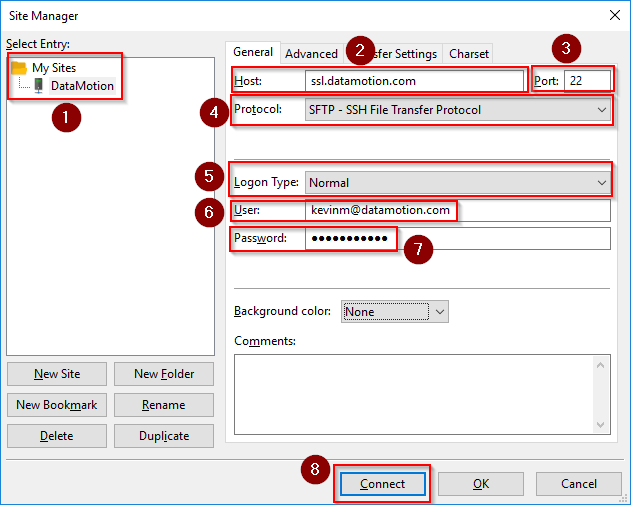
- (Optional) Rename the site to DataMotion
- Set the Host: to ssl.datamotion.com.
- Set the Port: to 22.
- Set the Protocol: to SFTP – SSH File Transfer Protocol.
- Set the Logon Type: to Normal.
- For the User: field enter your SecureMail account’s email address.
- For the Password: field enter your SecureMail account’s password.
- Click the Connect button.
- Click the checkbox next to Always trust this host to add the host key to the cache.
- Click the OK button.

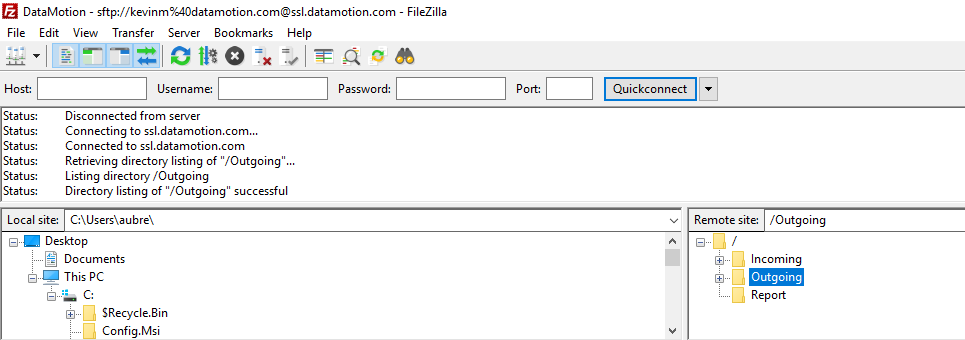
- The connection to the server will be completed and your directory will be loaded.
Sending a File
Once you have connected to your account you will be ready to send files to recipients of your choosing. Follow the instructions below to send a file using Secure File Transfer.
- Under the Remote site: directory select the Outgoing directory.
- Select the directory for the email address you wish to send to.
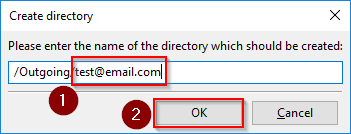
- (Optional) If you have no directories under Outgoing, create one following the steps below:
- Right click on the Outgoing directory.
- Select Create directory.
- Type an email address in the place of the New directory text.
- Click OK.
- Drag a file into the directory of your choice.
- The file will be sent to the email address specified by the directory as a secure message.
Please note that once the file is uploaded the name of the file will be changed. The file will have the Message ID (MID) of the secure message that was sent to the intended recipient pre-pended to the filename. This will look similar to the following:
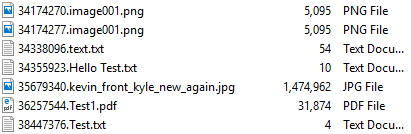
This pre-pended MID allows you to lookup the sent message in the SecureMail web portal or via the API should you desire to.